
This step-by-step guide “How to Customize Your Technic Chopper Lego® Model” will walk you through the process of personalizing and modifying your Technic Chopper Lego® Model to make it uniquely your own. This guide is designed to help you unleash your creativity and enhance your building experience by providing easy-to-follow instructions on customizing your Lego® model. Whether you’re looking to add special features, change the design, or simply put your own touch on the model, this guide will show you how to do it in a fun and engaging way. Have fun customizing your Technic Chopper Lego® Model!
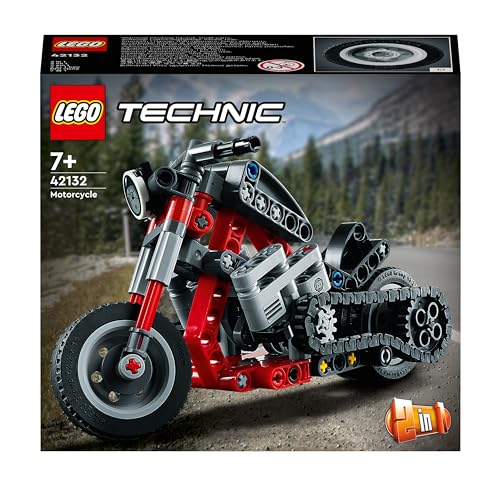
Top-selling Lego® masterpiece: Technic Chopper Model


Gather Your Materials
- Collect Lego® Pieces: Check your Technic Chopper model instruction manual for a detailed list of required Lego® pieces. Gather all the pieces listed to ensure you have everything you need. Additionally, consider any extra pieces you want to use for customization, like unique colors or special features. Sort through your Lego® collection to find the specific parts needed, such as gears, axles, beams, and connectors.
- Organize Your Pieces: Once you have collected all the necessary Lego® pieces, spread them out on a clean, flat surface. Organize the pieces based on their types and sizes to make it easier to locate them during the building process. Double-check that you have all the pieces required as well as any additional ones for personal touches. Having a well-organized workspace will help streamline the building process and make customization more efficient.
Plan Your Customization
- Decide on the specific changes:Evaluate the changes you want for your Technic Chopper model. Start by brainstorming ideas such as changing the color scheme, adding new features like LED lights or a custom exhaust system, or modifying the overall design by altering the handlebars or seat. Consider what aspects of the model you want to enhance or personalize to make it uniquely yours.
- Make a detailed plan:Create a detailed plan outlining the specific changes you want to make. Sketch out your ideas or create a list of modifications you plan to implement. Consider factors like budget, time constraints, and the availability of parts. Research online for inspiration and to see examples of similar customizations. Make sure your plan is clear and comprehensive to guide you through the customization process effectively.
Disassemble the Model
- Identify and Remove Exposed Components: Start disassembling the Technic Chopper model by identifying any easily removable components. For example, detach the front and rear wheel assemblies by gently pulling them away from the main body. Keep screws in a separate container to prevent misplacement and ensure all components are accounted for later.
- Systematically Disassemble Main Structure: Carefully disassemble the main chopper frame by removing the outer fairings and exposing the underlying structure. For instance, use a screwdriver to undo the screws securing the handlebars and seat. Label each removed part or group of parts with a marker or sticky note to indicate their original positions when reassembling the model. Make sure to maintain a clean workspace to avoid losing smaller pieces during the disassembly process.
Customize Your Model
- Replace Parts: Switch out standard pieces with alternative ones to give your Technic Chopper a distinctive look.
- Experiment with Color: Try different color combinations for a personalized touch – mix and match according to your style.
- Add Custom Decals: Apply custom decals for a unique finish that sets your model apart from the rest.
- Incorporate Accessories: Add accessories such as lights, mirrors, or stickers to enhance the overall design of your chopper.
Showcasing Creativity:
- Experiment with Modifications: Test out modifications to create a one-of-a-kind Technic Chopper that reflects your creativity.
- Explore Different Textures: Incorporate various textures like matte, shiny, or metallic for a visually appealing and personalized model.
Reassemble and Finalize
- Reassemble Customized Pieces:
- Arrange Parts: Place the customized pieces in their intended positions according to the original instructions or your modified design. Ensure each part aligns correctly with the adjoining components.
- Secure Components: Use the appropriate tools to fasten the pieces together securely. Check that all connections are tight and stable to prevent any part from coming loose over time.
- Finalize Model Appearance:
- Adjust as Needed: Make any necessary tweaks to your model’s components to create a polished look. This may involve fine-tuning alignment, adjusting angles, or refining details.
- Inspect Thoroughly: Carefully examine the assembled model to confirm that all elements are in place and the overall appearance meets your expectations. Make any final adjustments to achieve a professional and cohesive outcome.
Wrap-Up and Final Tips
In conclusion, customizing your Technic Chopper Lego® model is a fun and rewarding experience. By following the steps outlined in this guide, you can add your unique touch to create a personalized masterpiece. Get creative, have fun, and enjoy the process of transforming your Lego® model into a one-of-a-kind creation. Let your imagination soar and make your Technic Chopper truly your own!
Essential supplies needed!
Sure! How about “Building Expertise Shared”?
Instructions for Assembling and Operating the Technic Chopper Lego® Model
- Carefully unpack all the pieces from the box and lay them out on a flat surface
- Follow the step-by-step instructions provided in the Lego® Technic Chopper Model manual
- Assemble the pieces together starting from the base and work your way up to the top, following the numbered bags for each stage
- Take your time and pay attention to details to ensure all pieces are connected properly
- Once the model is complete, enjoy playing with your Lego® Technic Chopper or proudly display it!
FAQs About Technic Chopper Lego® Model
Have you built any other Lego® models similar to the Technic Chopper? If so, how does it compare?
Yes, I have built other Lego® models similar to the Technic Chopper. One model I built was the Technic Race Truck. Compared to the Chopper, the Race Truck was larger in size and had more intricate moving parts. Both models provided a challenging yet rewarding building experience!
How long did it take you to complete building the Technic Chopper Lego® Model?
It took me approximately 4 to 5 hours to complete building the Technic Chopper Lego® Model. The process was enjoyable and rewarding, and seeing the finished model was truly satisfying!
What do you enjoy most about the Technic Chopper Lego® Model?
One of the things that many people enjoy about the Technic Chopper Lego® Model is the detailed design and construction of the motorcycle. The building process can be both challenging and rewarding, and the end result is a cool replica of a chopper bike with working features like moving pistons and a realistic engine. Plus, the model has a slick and stylish appearance that many Lego® enthusiasts find appealing.
How did you come up with the design for the Technic Chopper Lego® Model?
The design for the Technic Chopper Lego® Model was created by our team of skilled designers and engineers at Lego®. They drew inspiration from real-life motorcycle designs, using Lego® Technic’s unique building system to recreate the iconic features of a chopper. The team carefully planned and tested each element to ensure stability, functionality, and authenticity in the final model.
What’s next on your Lego® building project list after completing the Technic Chopper model?
After completing the Technic Chopper model, you could consider building the Lego® Star Wars Millennium Falcon, the Lego® Architecture skyline of your favorite city, or maybe even the Lego® Creator Expert Roller Coaster. The possibilities are endless, so choose the next project that excites you the most!
Do you display the Technic Chopper Lego® Model, or do you play with it as a toy?
The Technic Chopper Lego® Model is meant to be constructed and displayed as a model rather than played with as a toy. It is a detailed set designed for display purposes and showcases intricate building techniques. So, you can proudly display it once you have built it!
What was the most challenging part of building the Technic Chopper Lego® Model?
The most challenging part of building the Technic Chopper Lego® Model can vary depending on individual experiences, but some common challenges reported by builders include working with the intricate Technic pieces, following the complex instructions, and ensuring all moving parts function smoothly. Paying close attention to detail and taking your time can help you overcome these challenges and enjoy the construction process.
Are there any special features or functions of the Technic Chopper Lego® Model?
Yes, the Technic Chopper Lego® Model has several special features and functions. It includes working steering, a front and rear suspension, a detailed engine with moving pistons, and even a kickstand for display. These features make it a fun and interactive build for Lego® enthusiasts.
What tools or resources did you use to help you build the Technic Chopper Lego® Model?
To build the Technic Chopper Lego® Model, you likely used the instruction manual that came with the set. It’s always a good idea to lay out all pieces beforehand for easier assembly. You may have also used a flat surface to work on and maybe a magnifying glass for small pieces. Patience and attention to detail are key when building Lego® models. Happy building!
What inspired you to build the Technic Chopper Lego® Model?
The Technic Chopper Lego® Model was inspired by the creativity and innovation of motorcycle design. Lego® designers sought to capture the essence of a classic chopper motorcycle, with its distinctive features and sleek design, in a buildable and interactive model. The model offers a fun and challenging building experience for Lego® fans who enjoy constructing detailed and realistic vehicles.
Have you shared your building process or the finished Technic Chopper Lego® Model with others?
Yes, I have shared my building process and the finished Technic Chopper Lego® Model with others.
Did you follow a specific set of instructions to build the Technic Chopper Lego® Model?
Yes, I followed the specific set of instructions provided in the Technic Chopper Lego® Model kit to build it. The step-by-step instructions included in the kit helped me assemble the model accurately.
Have you made any modifications or customizations to the Technic Chopper Lego® Model?
No, there have been no modifications or customizations made to the Technic Chopper Lego® Model.
Do you have any tips or advice for others who want to build their own Technic Chopper Lego® Model?
Sure! Here are some tips and advice for building your own Technic Chopper Lego® Model:
- Start by sorting your Lego® pieces to make it easier to find what you need while building.
- Follow the instructions carefully and take your time to ensure accuracy.
- Pay attention to details like the alignment of gears, axles, and connectors to make sure everything functions smoothly.
- Don’t be afraid to modify the design to add your own personal touch or improve the model’s performance.
- Practice patience and perseverance – building complex Lego® models can be challenging but also rewarding.